HP Profile Overview:
Before running a heat penetration test, CALSoft displays a form that allows you to document information related to the test you are conducting. This is referred to as the Test Documentation screen. On this screen, you have the option of either entering the information manually, or importing the information through a previously-created template containing documentation info. This second option is referred to as importing an "HP Profile."
When an HP Profile is created, any values or text will be saved for the fields they appear in. When an HP Profile is imported, the saved info, values, and text will automatically populate their respective fields.
HP Profiles are useful when dealing with commonly tested products. You can simply save the information that will be the same for the tests you are running, and just import the information prior to running each test. This way, you do not have to re-enter the same information each time you create a new heat penetration file.
Creating an HP Profile:
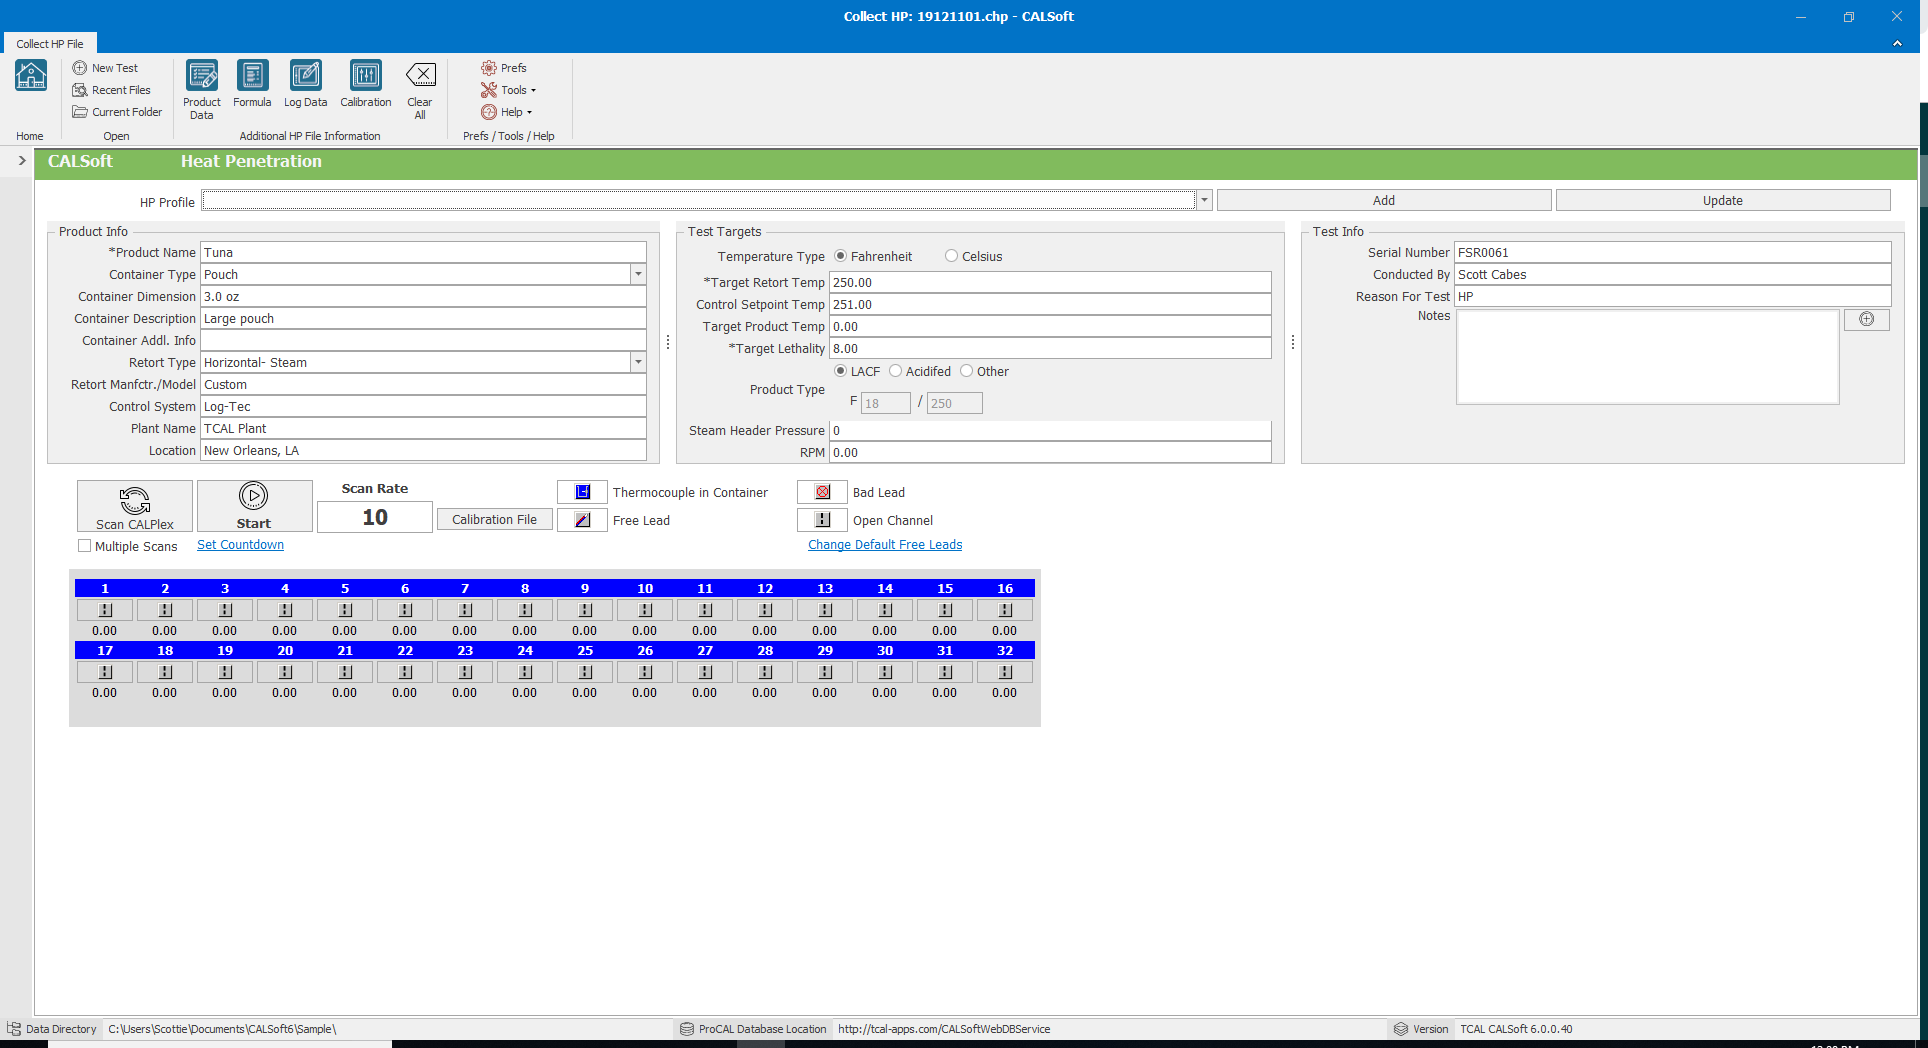
To create an HP Profile, while on the HP Test Documentation screen:
- Enter any information you would like to have saved in your profile. The fields you enter information in, will be the fields that are auto-filled when the profile is imported.
- When you have finished filling your desired fields, click "Add" to the right of the "HP Profile" drop-down box.
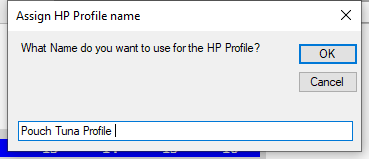
- CALSoft will ask you to name this HP Profile. Enter a name and then click "OK."
- The HP Profile will now be created and saved.
Importing an HP Profile:
To import an HP Profile, while on the HP Test Documentation screen:
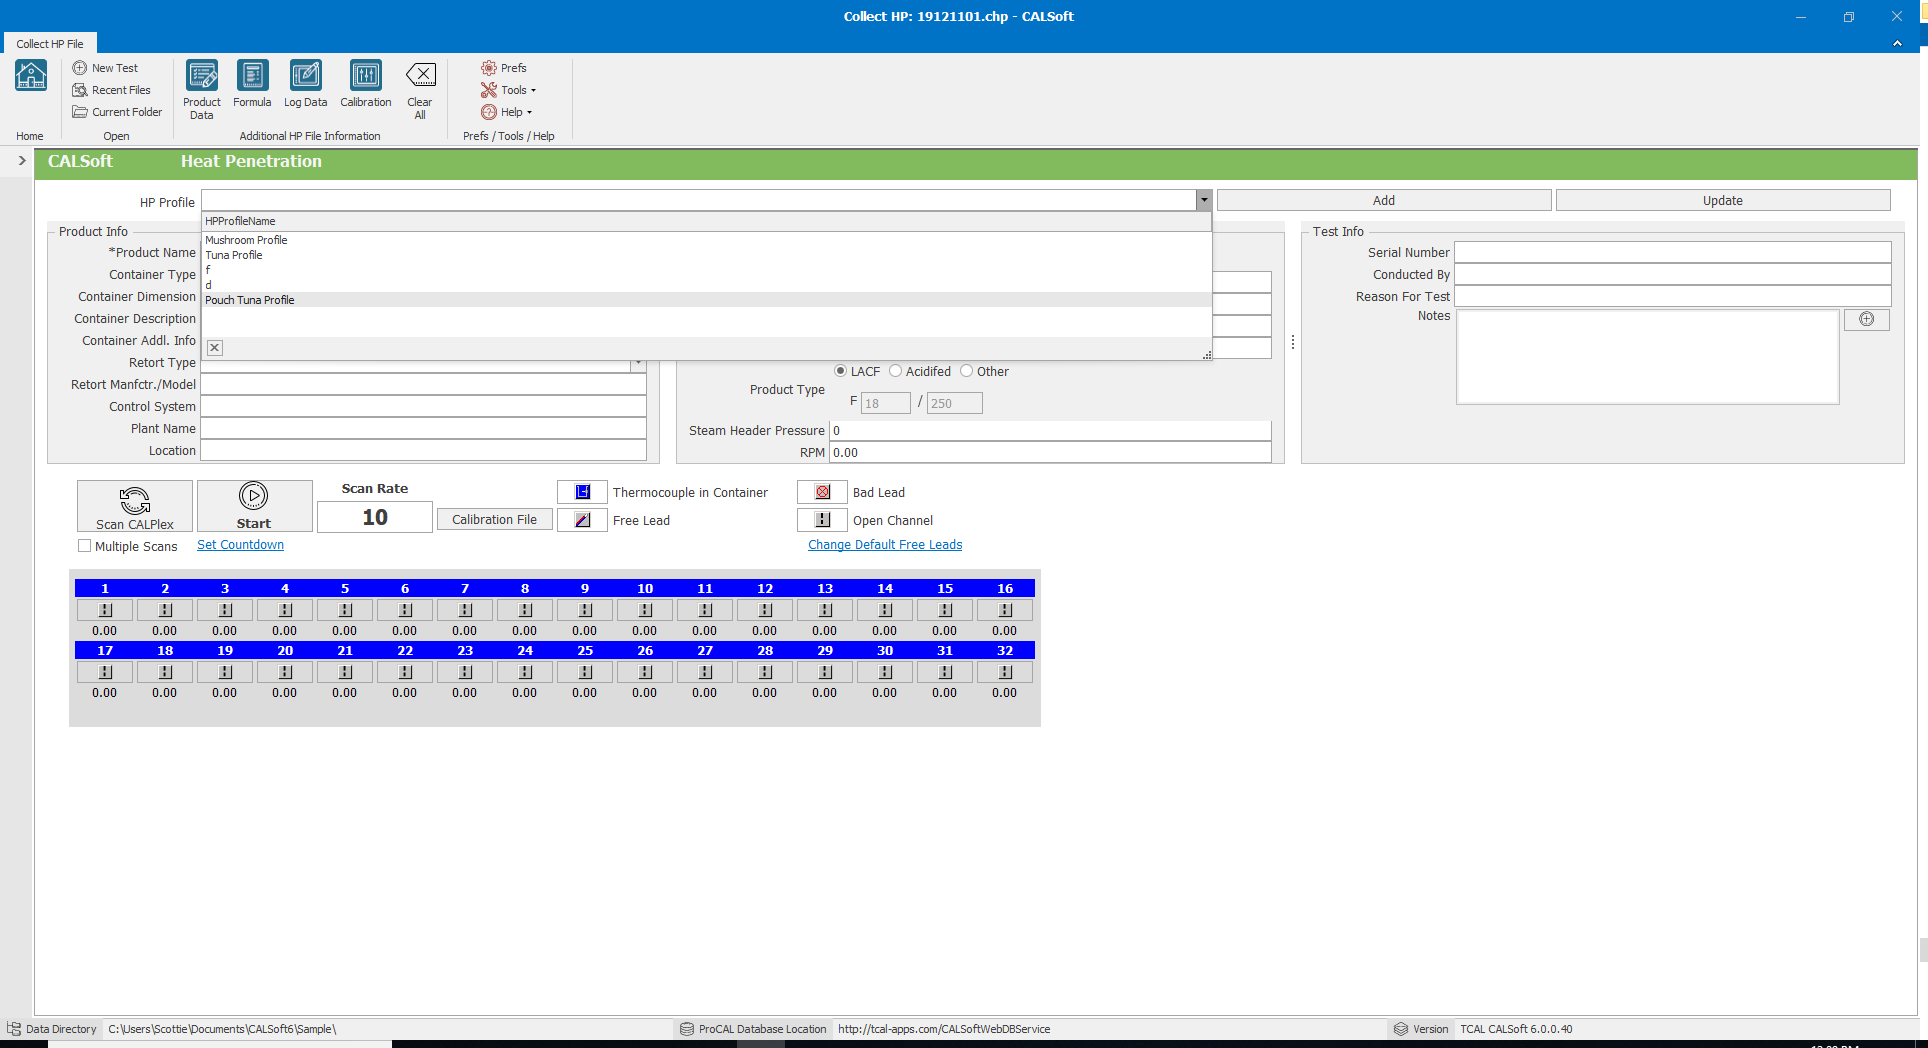
- Go to the "HP Profile" drop-down box and click on it.
- Select the HP Profile you would like to import.
- The profile will then be imported and the saved information will auto-fill into their respective fields.
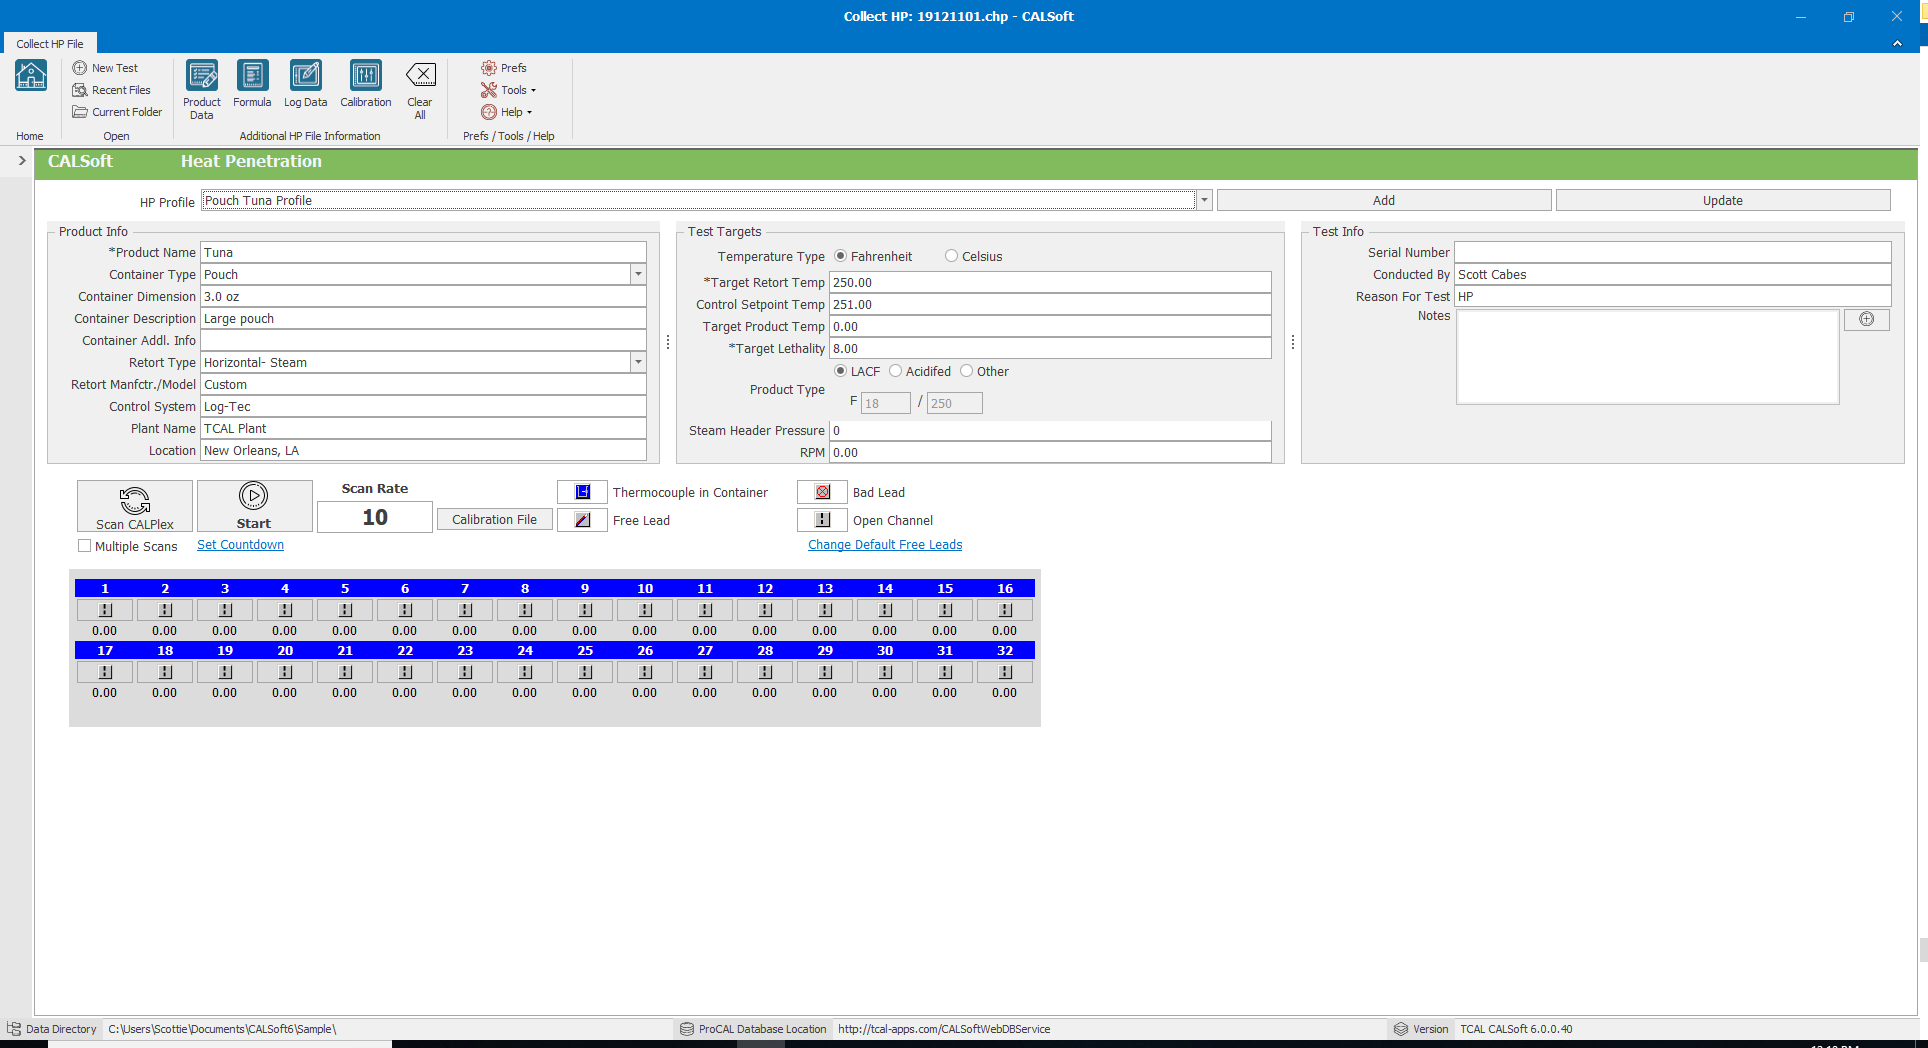
After you import an HP Profile, you can edit and update the profile by changing information and then clicking "Update" to the right of the HP Profile drop-down box.