CALSoft uses a database to store all of the process calculations, temperature distribution “set cut/vent” projects, and deviation evaluation projects. This database is referred to as the “ProCAL” database. When CALSoft 6 is installed on your computer, a new, empty version of the database (ProCAL.mdb) is created. As you create new records in CALSoft 6, those records are added to the ProCAL.mdb database.
(** To Learn more about the ProCAL database, see this article.)
If you were a user of the old CALSoft 5 version, you can update and merge your old CALSoft 5 database (ProCAL5.mdb) into the new format of the CALSoft 6 database (ProCAL.mdb). This will allow you to access all of your CALSoft 5 records using CALSoft 6.
To do this, please follow these directions:
- NOTE: CALSoft 6 must be on the same computer where CALSoft 5 was located in order for this utility to work. If CALSoft 5 is on a different computer, please contact us for assistance at support@tcal.com as these directions below will not work.
STEP 1: Make sure the CALSoft 5 ProCAL database is in the expected location.
It is recommended to first check and see if your CALSoft 5 ProCAL5 database is in the proper location. To check this:
- Open CALSoft 5
- Go to “Set A Process” section
- Click “OPEN”
- This should open your CALSoft 5 ProCAL database, and you should see the ProCAL records you created in CALSoft 5
If this is successful, your CALSoft 5 ProCAL database is in the expected location and you can move to Step 2.
However, if the CALSoft 5 ProCAL database is not in the expected location, you will see a message that says “Cannot Currently Access your ProCAL database”.
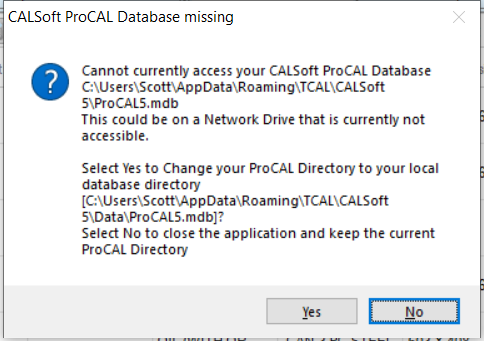
In this case, click YES to set the location of your CALSoft 5 ProCAL database using the Preferences section of CALSoft 5. Then go through the steps listed above again.
STEP 2: Update to CALSoft 6 Version 6.1.2.0:
CALSoft 6 must be installed on your computer. Make sure to update CALSoft 6 to version 6.1.2.0. The version number is listed at the bottom-right corner of the CALSoft 6 software. If you have version 6.1.2.0, move on to Step 3.
If you do not have version 6.1.2.0, follow these steps to update:
- Open CALSoft 6
- You must be connected to the internet
- In the top-right menu, click the USER button, and then choose “Check for Current Version”

- Follow the instructions to install the update
- Once complete, you should see that you have Version 6.1.2.0 (in the bottom-right corner of the screen)
STEP 3: Find the updater utility file called “UpdateProCALforCalSoft6.exe”.
This file is located on your computer in the folder where you installed CALSoft 6. To find this folder and locate the file, follow these directions:
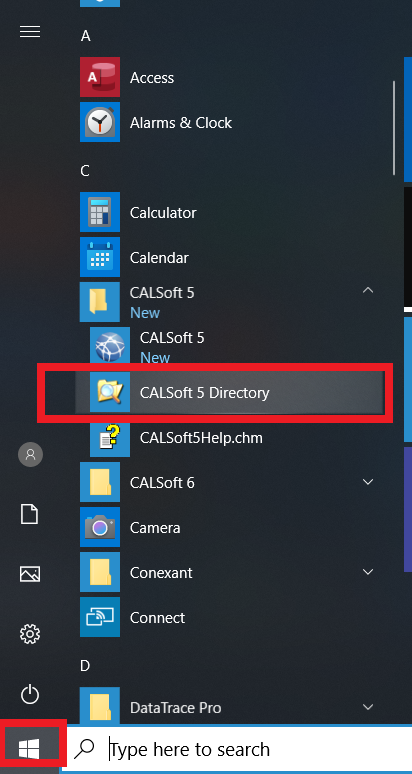
- Click the Windows START button
- On the list of programs find and Click the CALSoft 6 folder… then Click “CALSoft 6 Directory”.
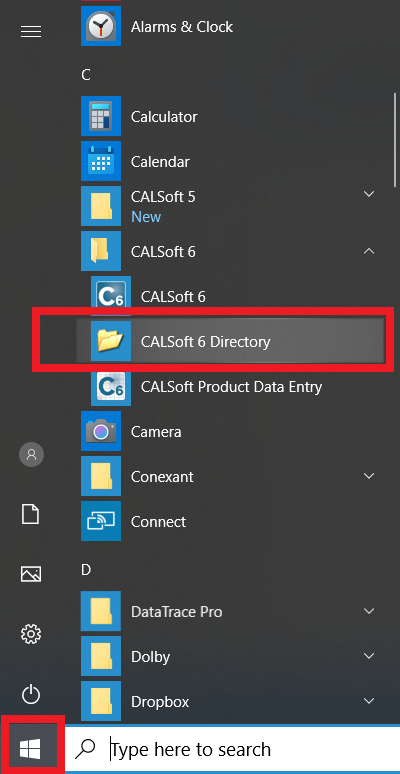
- This will launch the folder where CALSoft 6 is installed.
- You should see the file UpdateProCALforCalSoft6.exe.
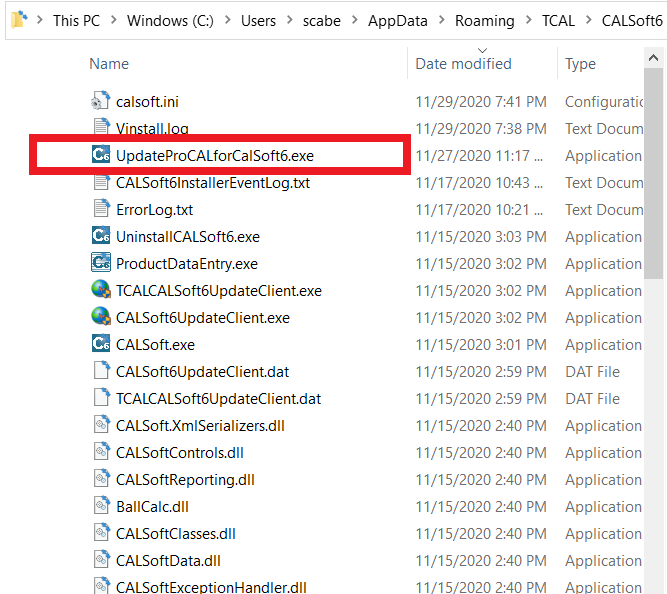
STEP 4: Run the file UpdateProCALforCalSoft6.exe.
Once you locate the file, run (double click to run) the file UpdateProCALforCalSoft6.exe. This file utility will locate CALSoft 5 on your computer, then locate your CALSoft 5 database, and then convert/merge that old CALSoft 5 database into your new CALSoft 6 ProCAL database. You will see a window pop-up once the utility begins.
If everything is in the right place, the utility will run, and the window will close.

** NOTE: Depending on the number of records in your old ProCAL5 database, this may take a few minutes. In our tests, it took 5 minutes to migrate 500 records from CALSoft 5 to CALSoft 6 ProCAL.mdb.
At this point, your CALSoft 5 ProCAL records will have been merged into your CALSoft 6 ProCAL database. You can proceed to Step 5.
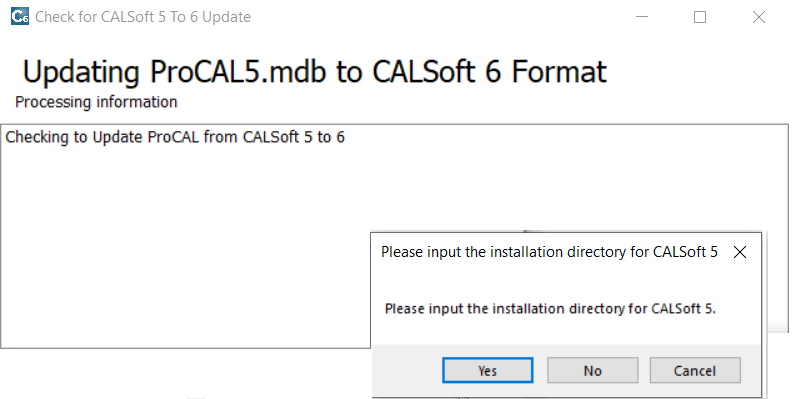
If CALSoft 5 was not installed in the default location, you will see a message asking you to “Input the directory location for CALSoft 5”. If you get this message, click YES and navigate to the directory where CALSoft 5 is installed and click OK.
NOTE: If you do not know where CALSoft 5 is installed, follow these directions:
- Click the Windows START button
- On the list of programs find and Click the CALSoft 5 folder… then Click “CALSoft 5 Directory”.
- This will launch the folder where CALSoft 5 is installed.
- Note the folder/directory location in the address bar. You may need to click on the address bar to see the complete “path”
- The utility should continue to run from here and the window will close. At this point, your CALSoft 5 ProCAL records will have been merged into your CALSoft 6 ProCAL database.
STEP 5: Check your merged ProCAL database in CALSoft 6:
If the updater utility ran correctly, the ProCAL records you created in CALSoft 5 should be in your ProCAL database in CALSoft 6. To check this, follow these directions:
- Open CALSoft 6
- Go to “Set A Process” section
- Click “OPEN”
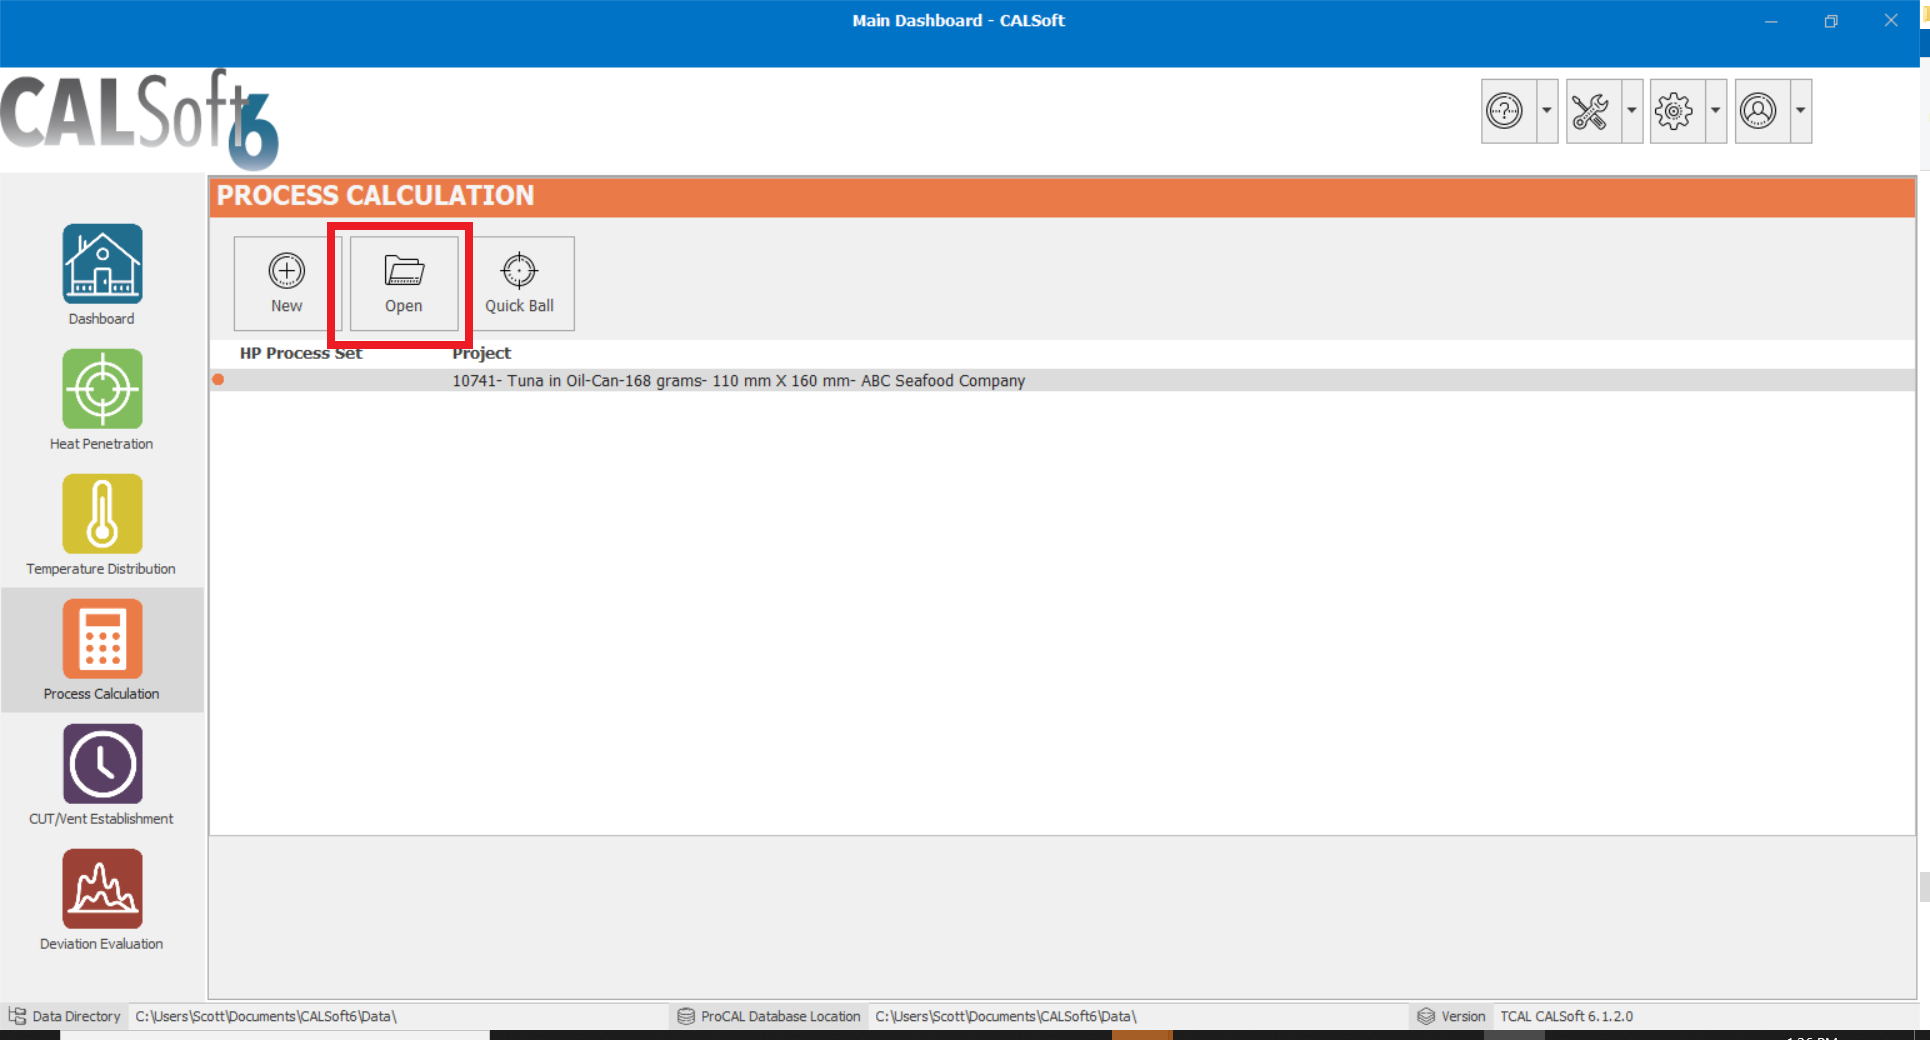
- This should open your CALSoft 6 ProCAL database, and you should see the ProCAL records you merged from CALSoft 5, along with any new records you had created in CALSoft 6.
Follow the same steps for “Cut/Vent Establishment” and “Deviation Evaluation” sections of CALSoft 6. You should also see any records in those sections that you created in CALSoft 5.
At this point, your CALSoft 5 ProCAL database has been successfully updated and the records merged into your new CALSoft 6 ProCAL database.